Labs
Lab 1: First Circuit, Switch, and Hello World
- Create your own circuit and a switch that is activated and deactivated by something other than your hands
- Set up a blog and send me the link here
- BLOG POST : Use photo video to document your circuit. Include a write up of your process and address the following issues: What does the switch do? Where could it reside? Who will use it? How did you make it?
- Install the Arduinio IDE: Run the "blink" example to make sure its installed correctly. (use the built in LED)
- Bring Your Circuit to Class (if possible)
- ITP Lab: Components
- ITP Lab: Setting up a breadboard
- ITP Lab: Using a multimeter (use Arduino to power the board, ignore the Voltage regulator)
- ITP Lab: Soldering
- Physical Computing: Introduction, Ch1, Ch2, Ch3
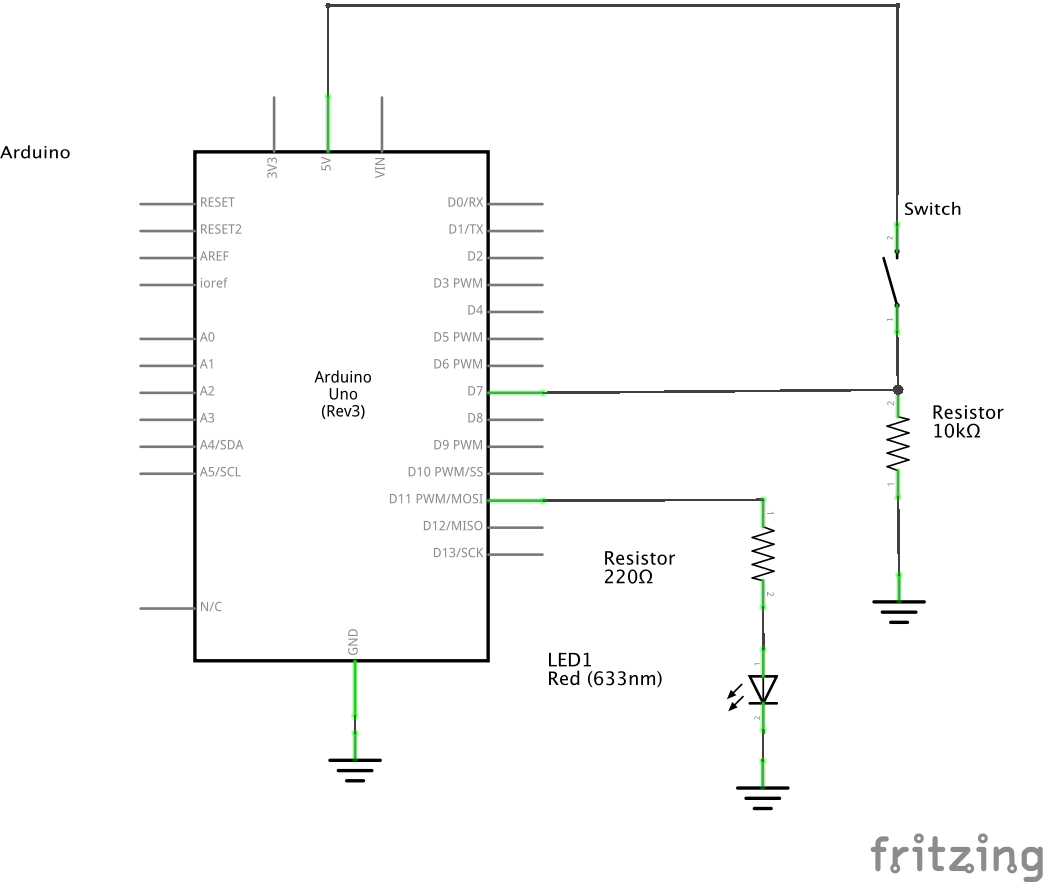
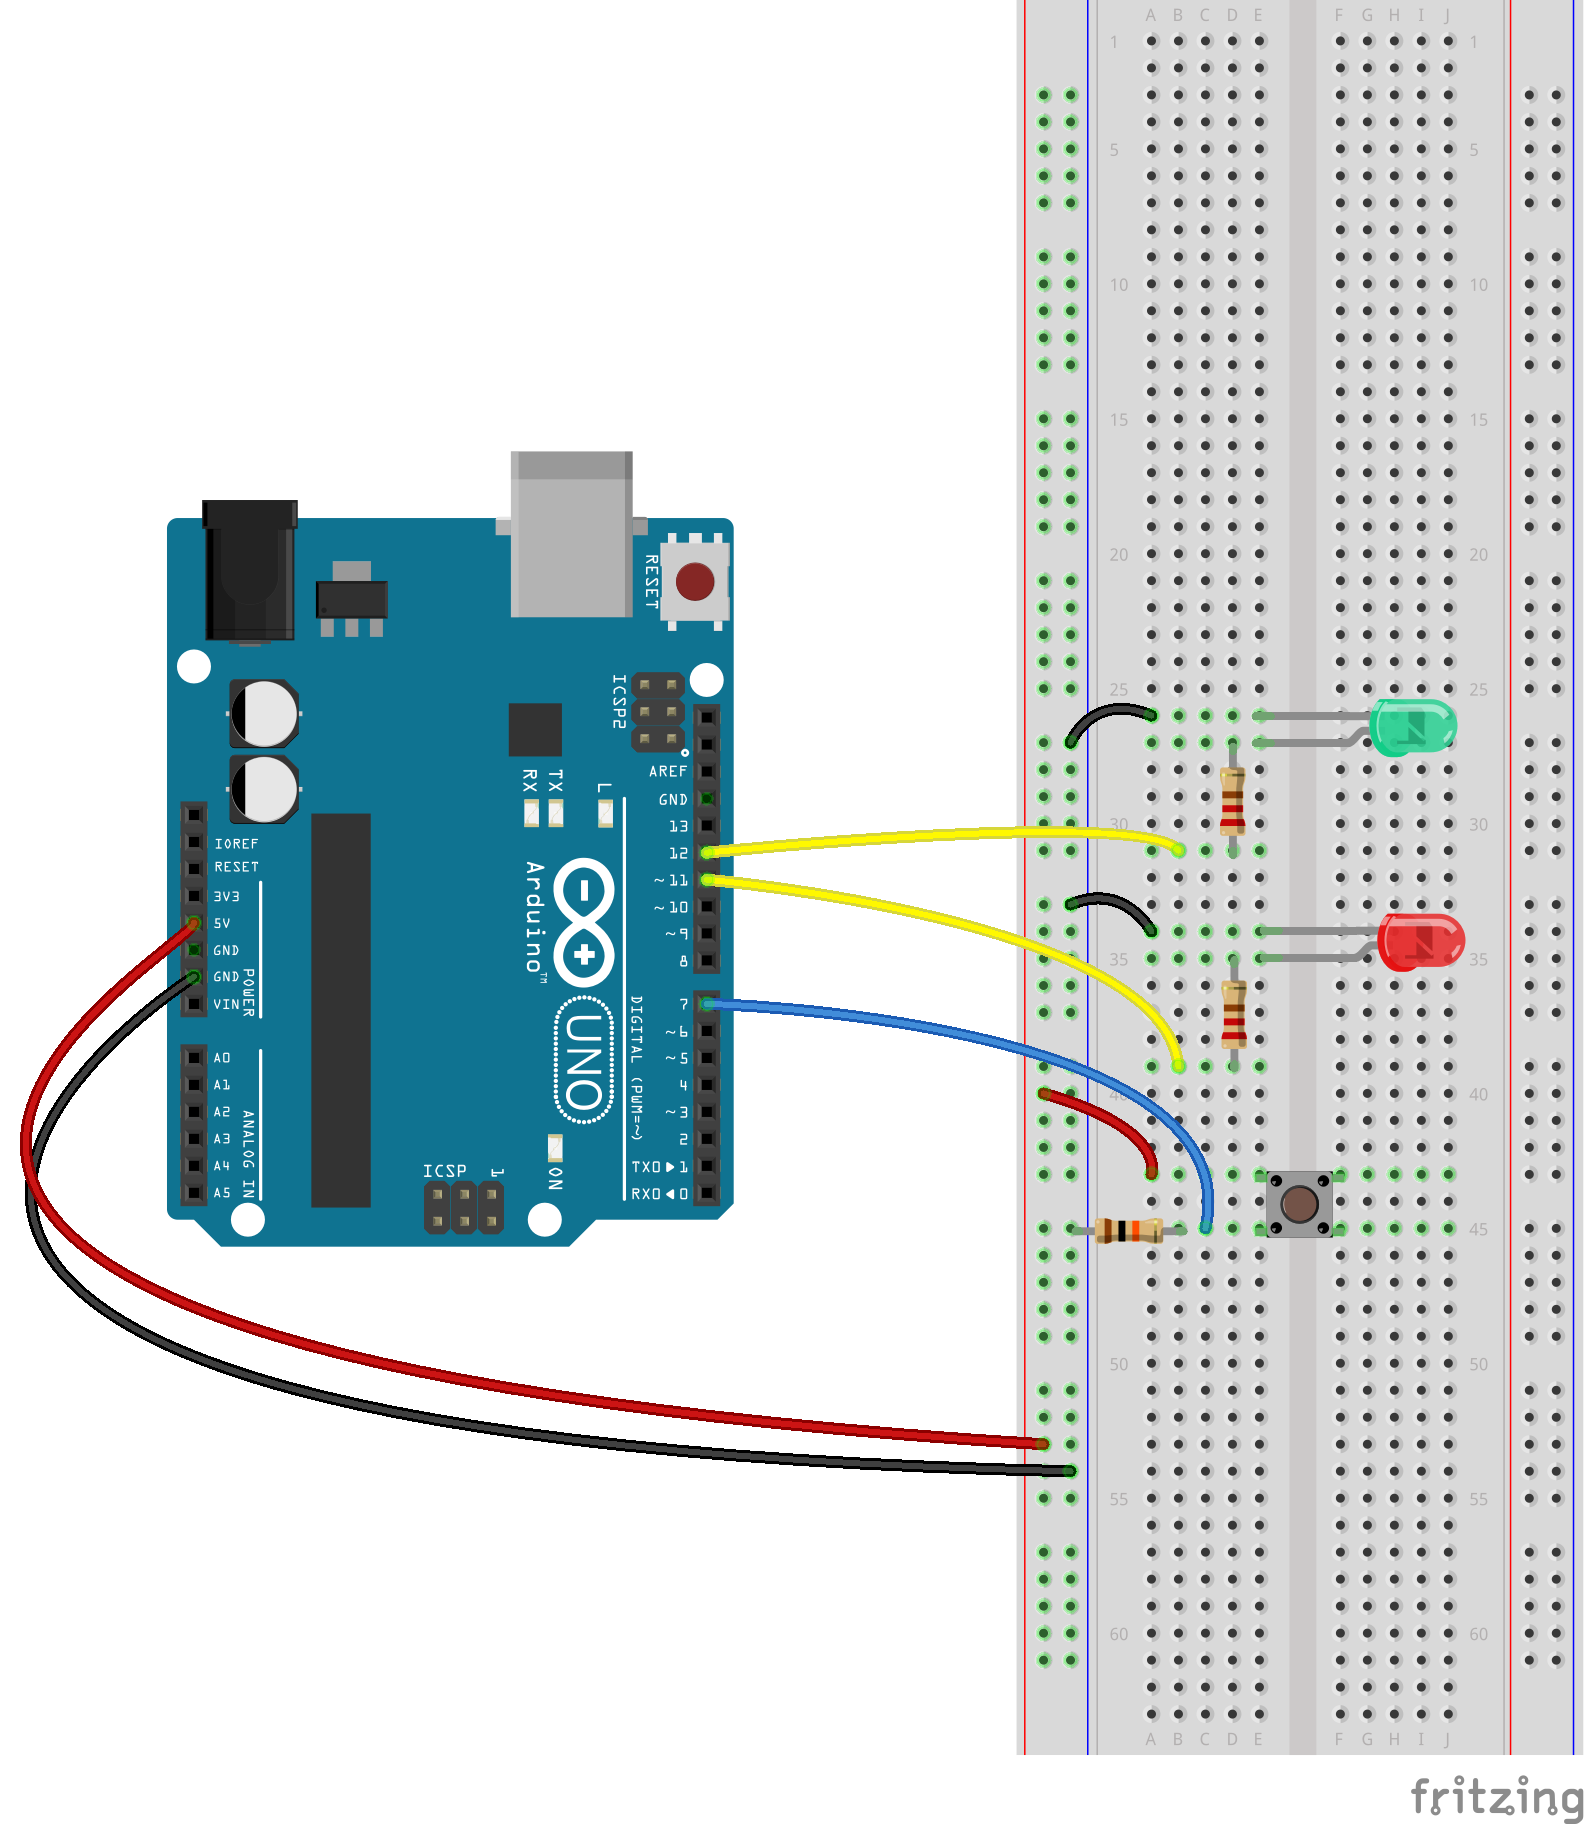
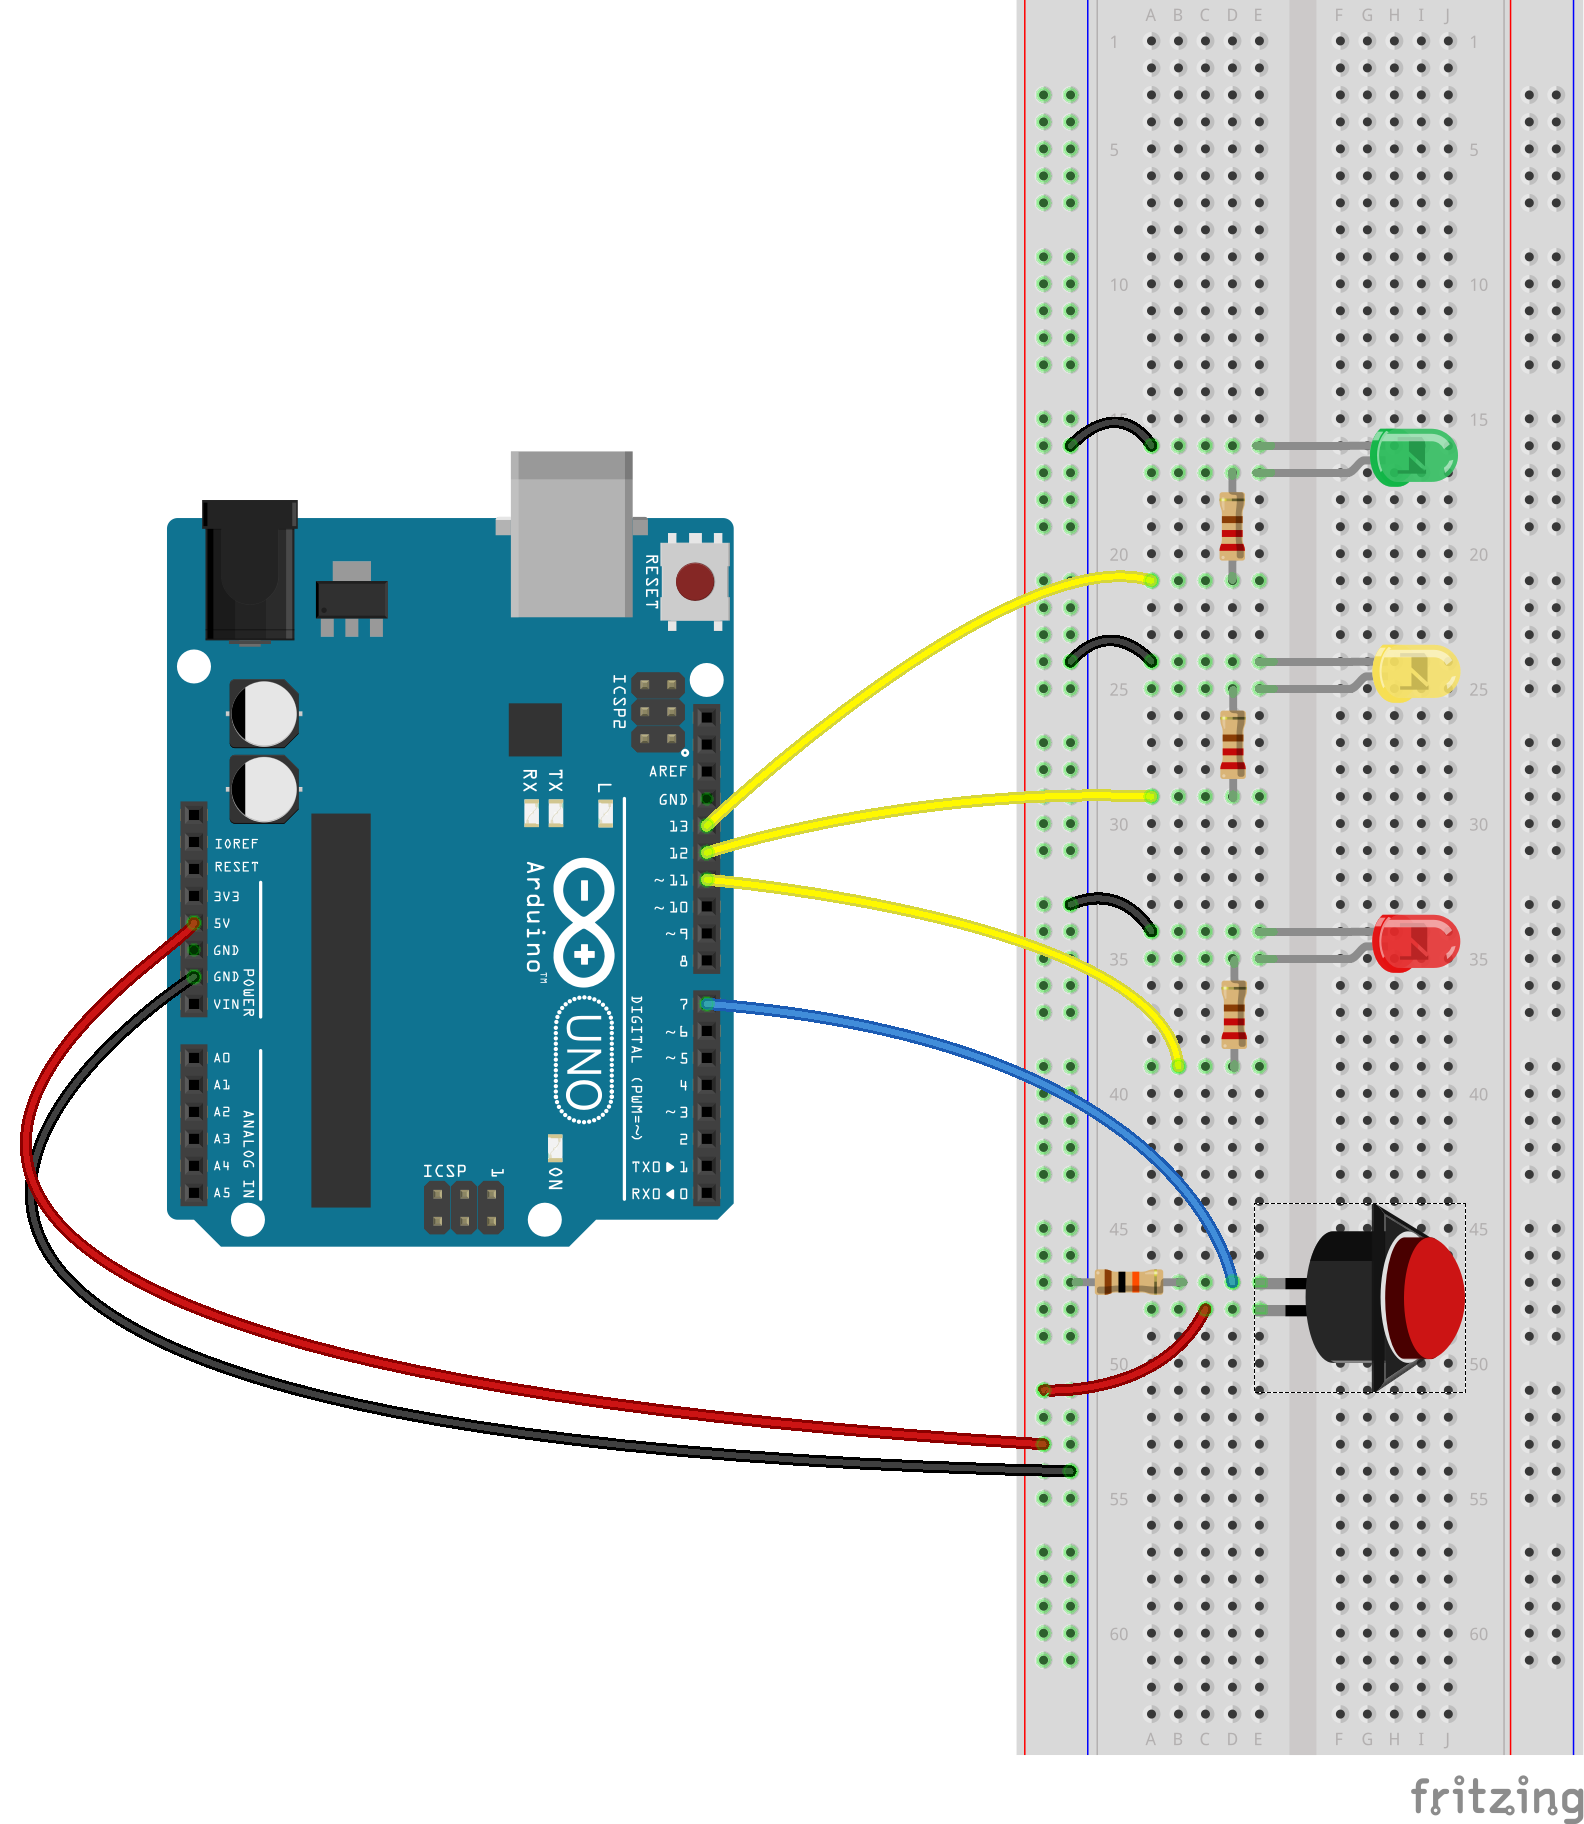
Lab 2: Input/Output
- Create another circuit or modify your existing circuit (still with no hands), this time using the arduino to read your input and to affect your output
- BLOG POST: Use photo video to document your circuit. Include a write up of your process and address the following issues: What did you change between your previous assignment and this one? What does this circuit do? Where could it reside? Who will use it? How did you make it?
Reflect:
What is new to you and what do you already know? Feel free to include any pictures of successes, failures, or questions.

- Class Notes
- ITP Lab: Digital Input Output
- ITP Lab: Microcontrollers
- VIDEO: Digital Input
- VIDEO: Digital Output
- Variables
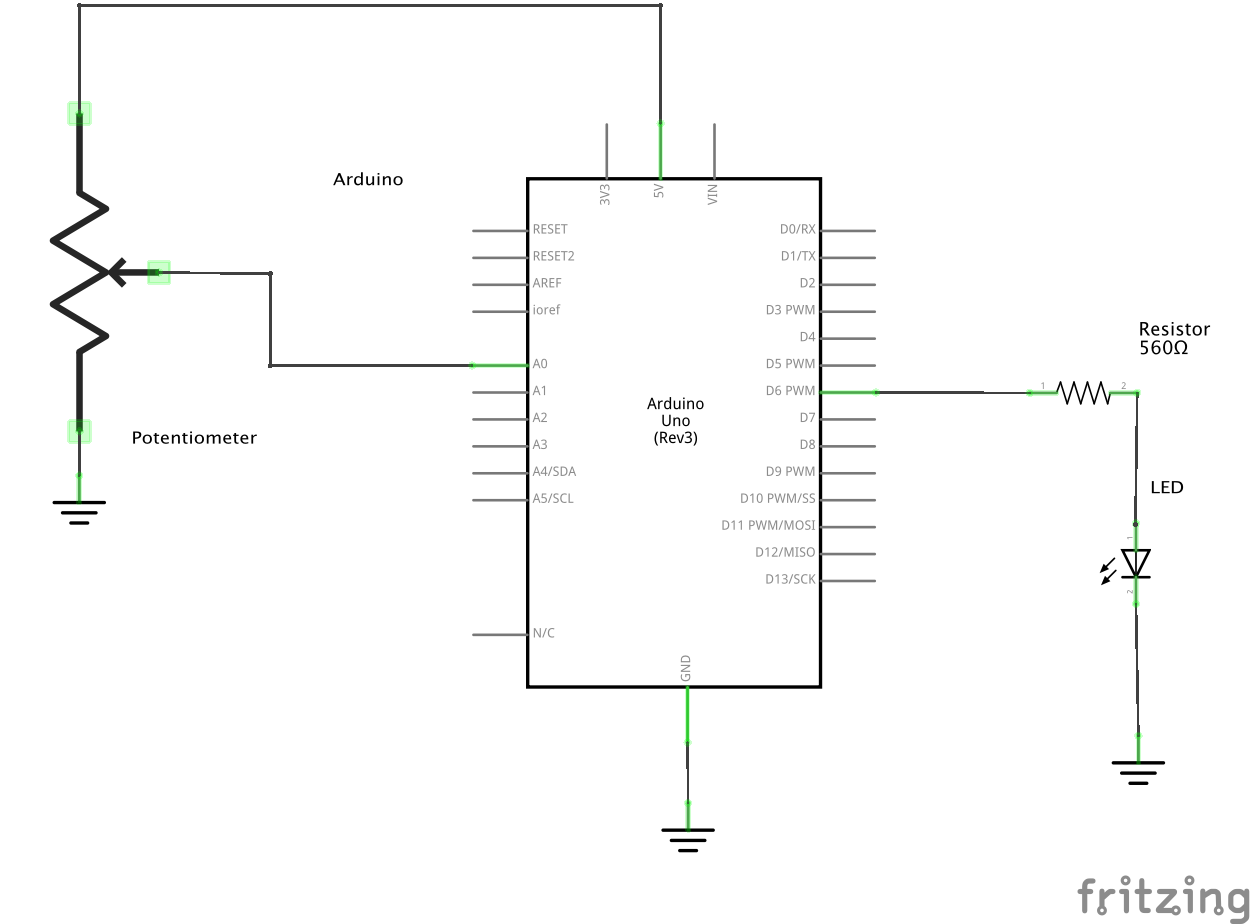
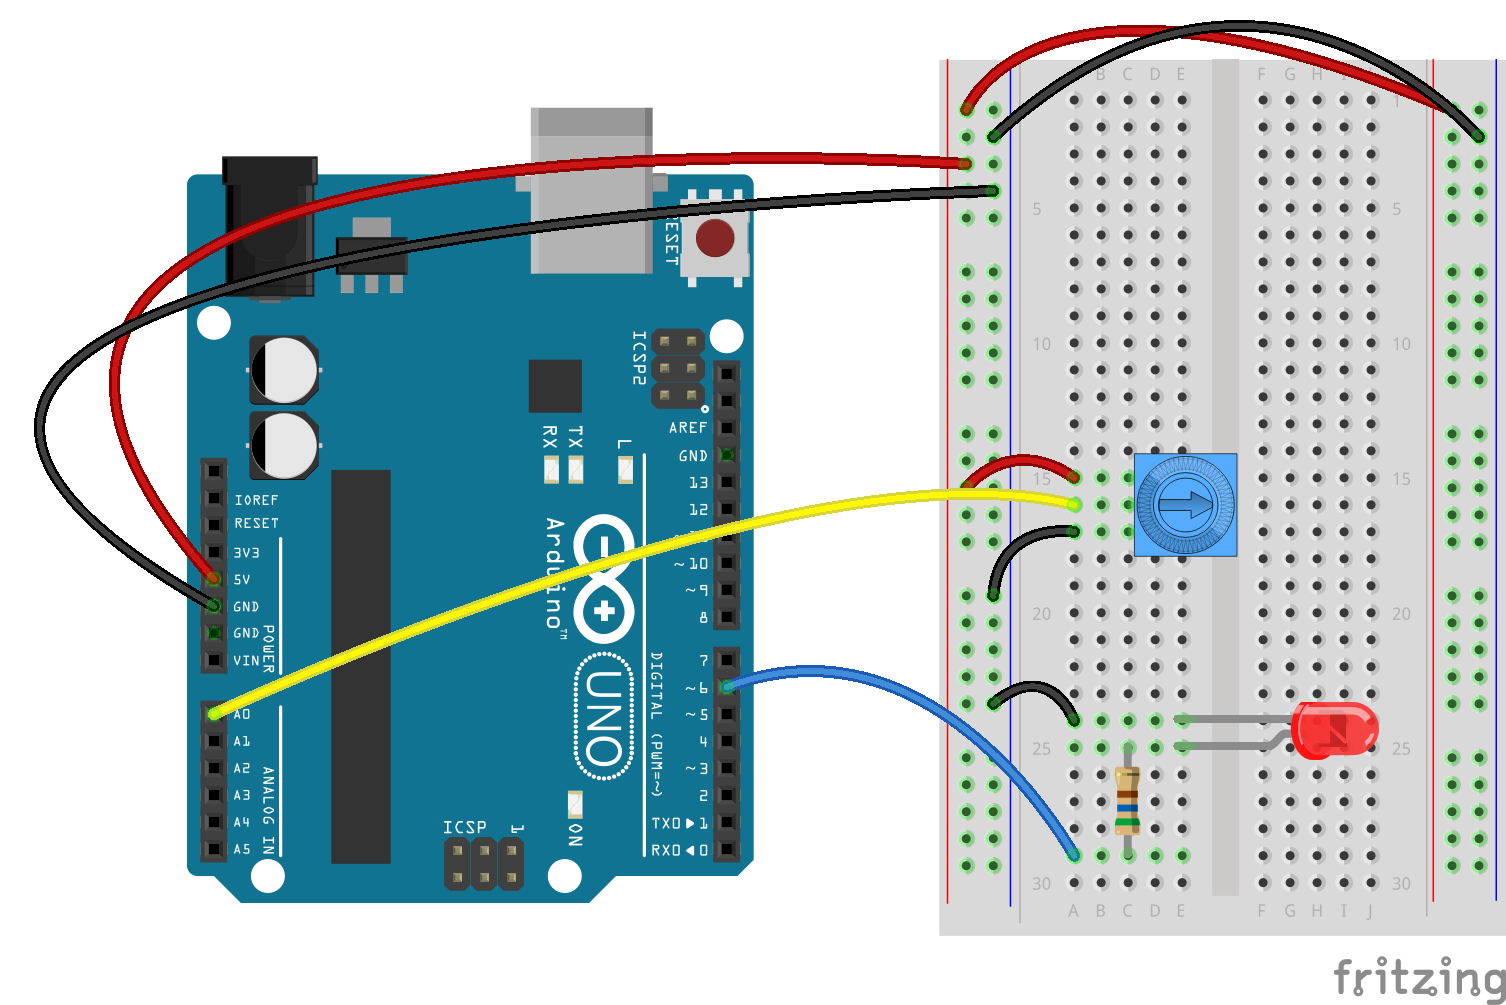
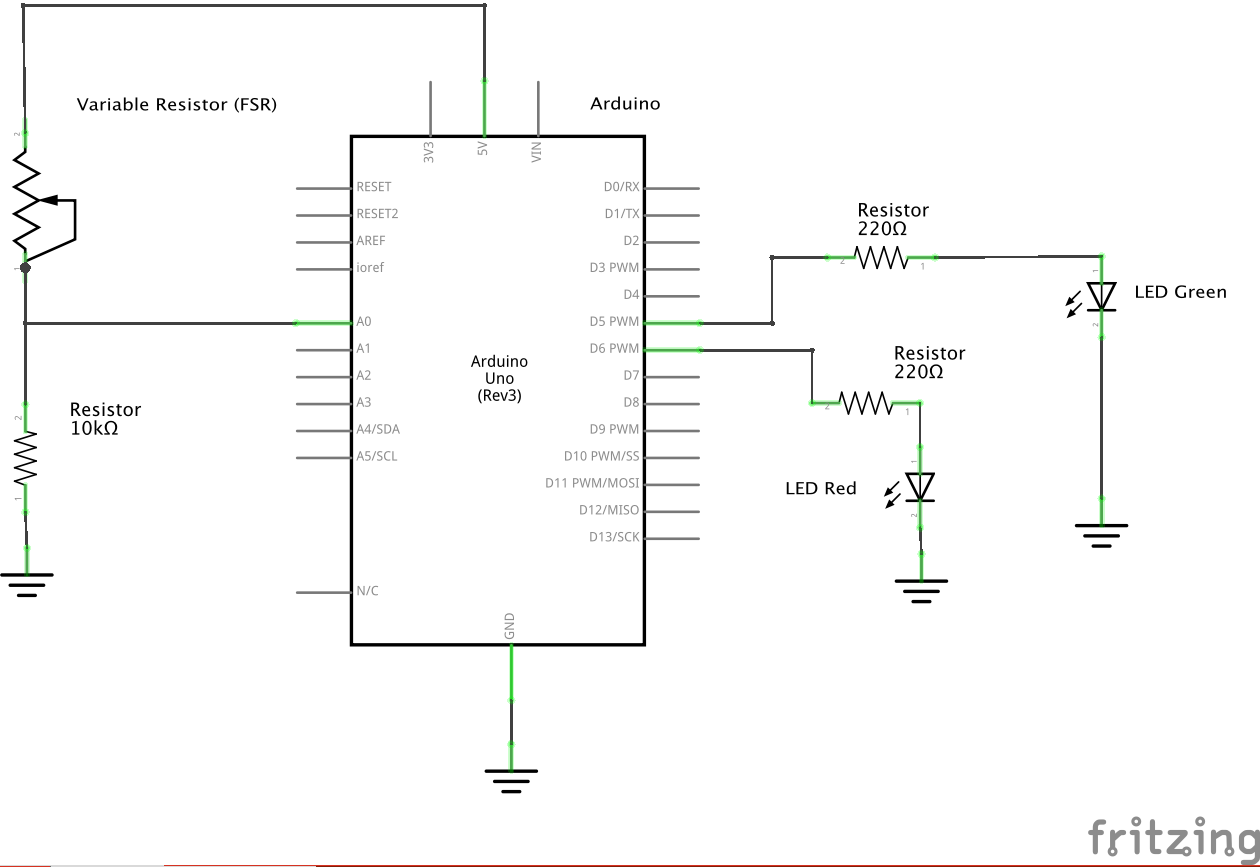
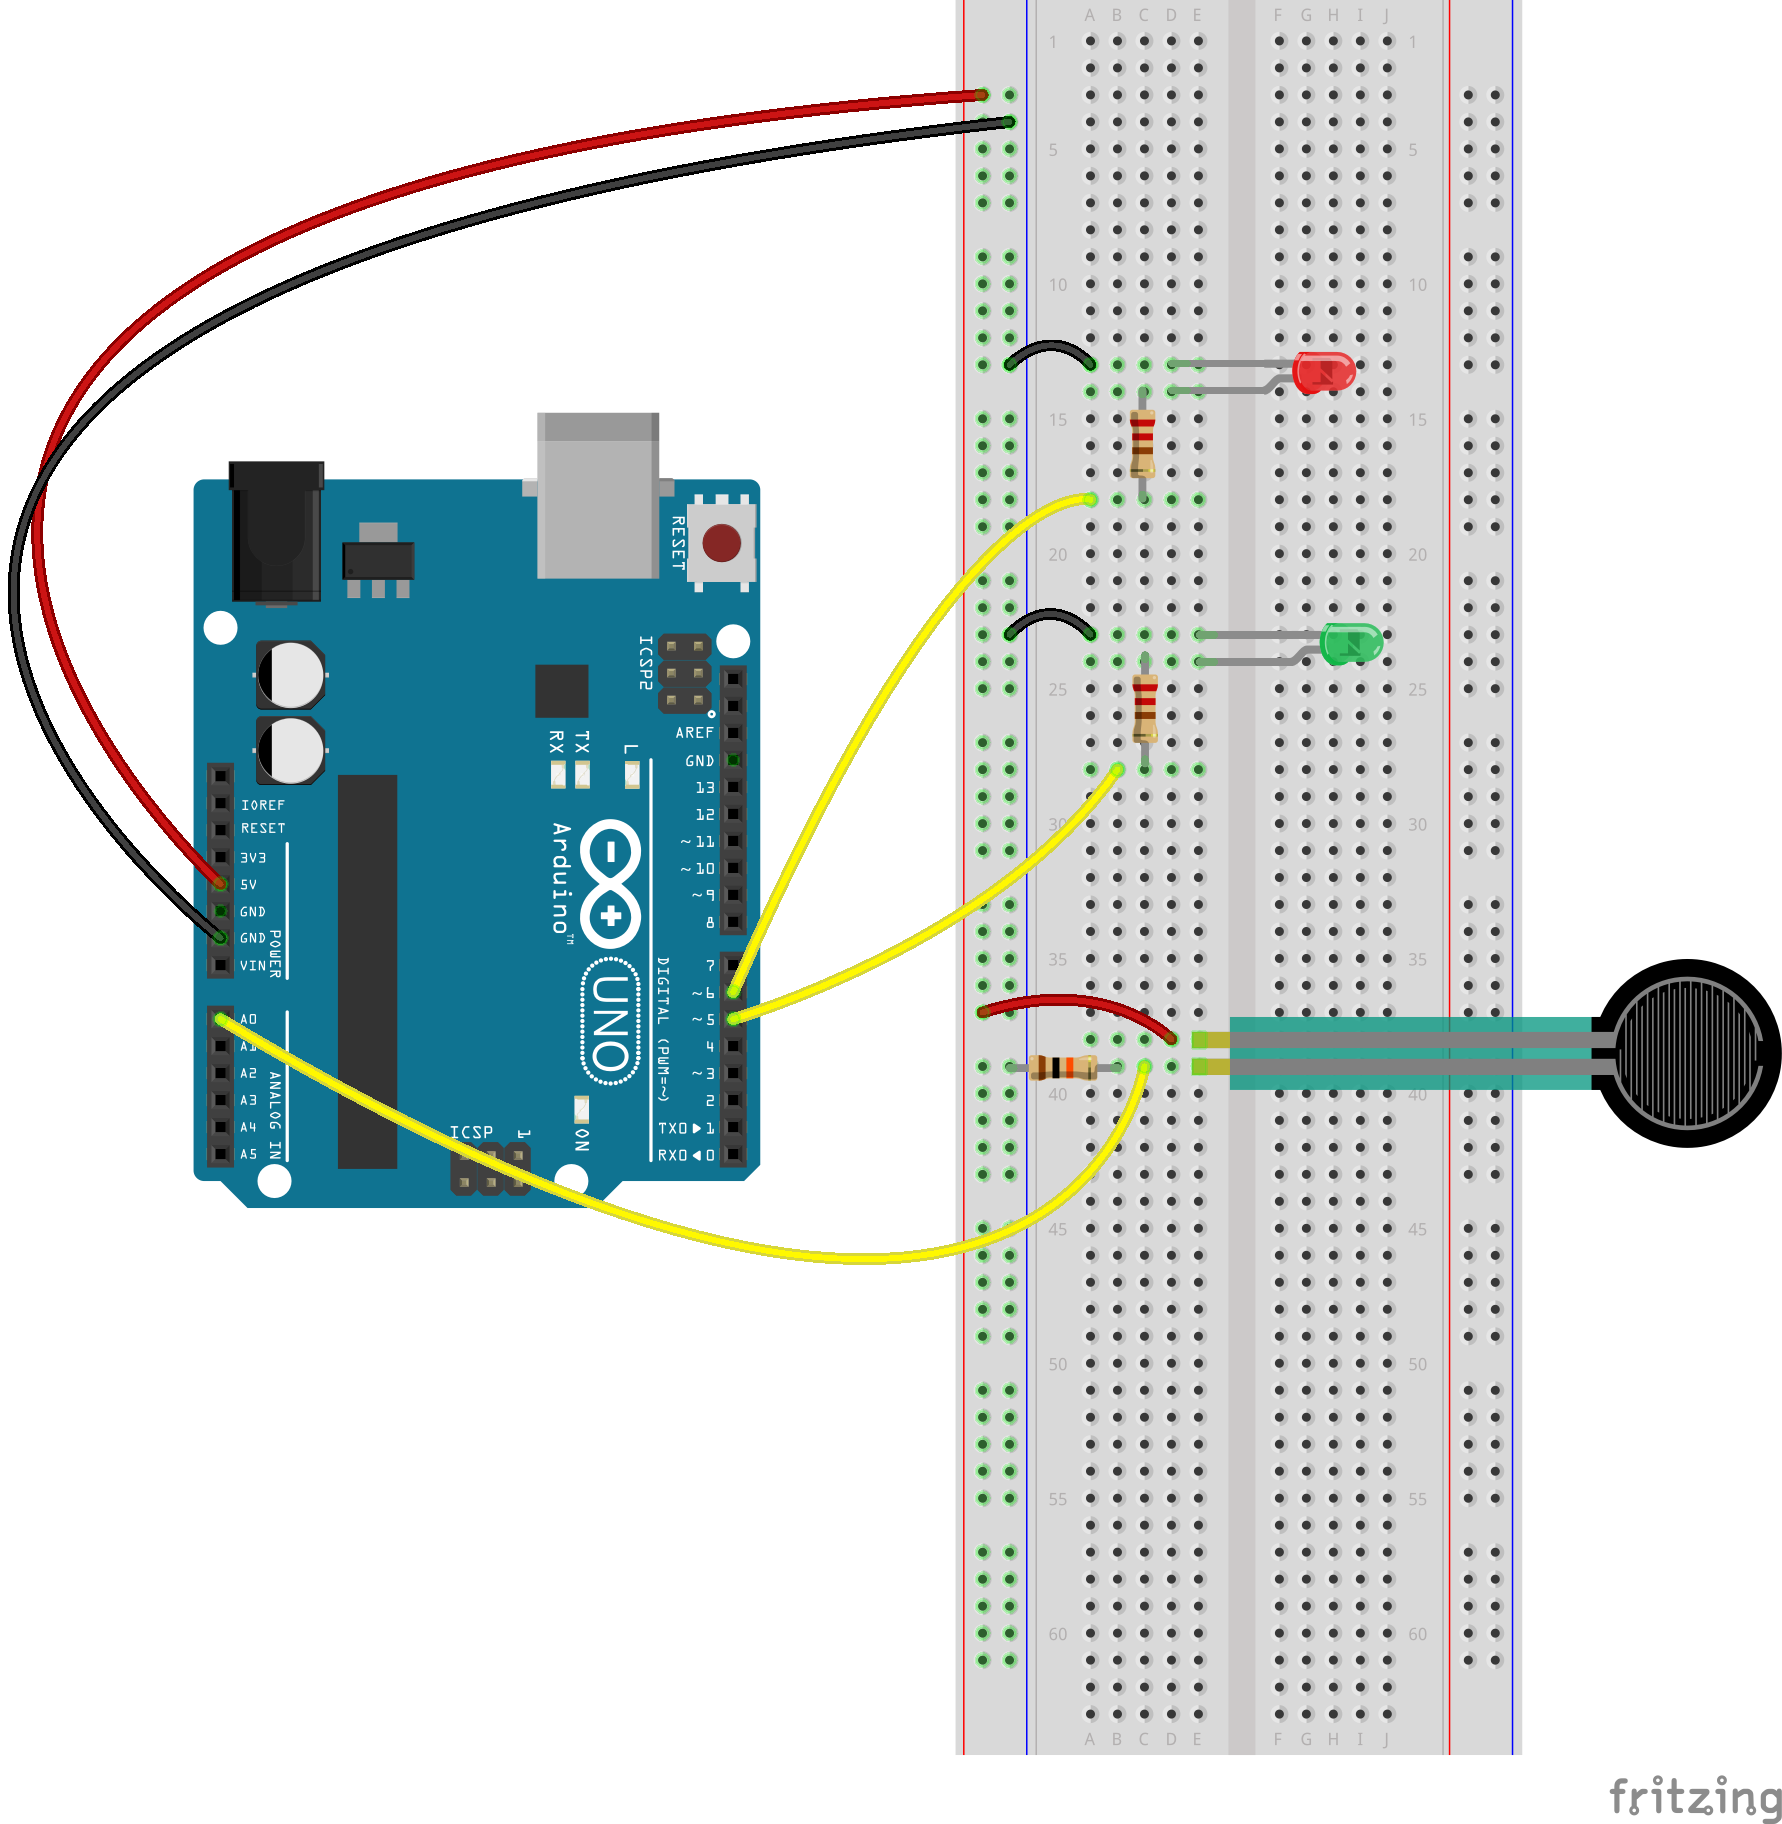
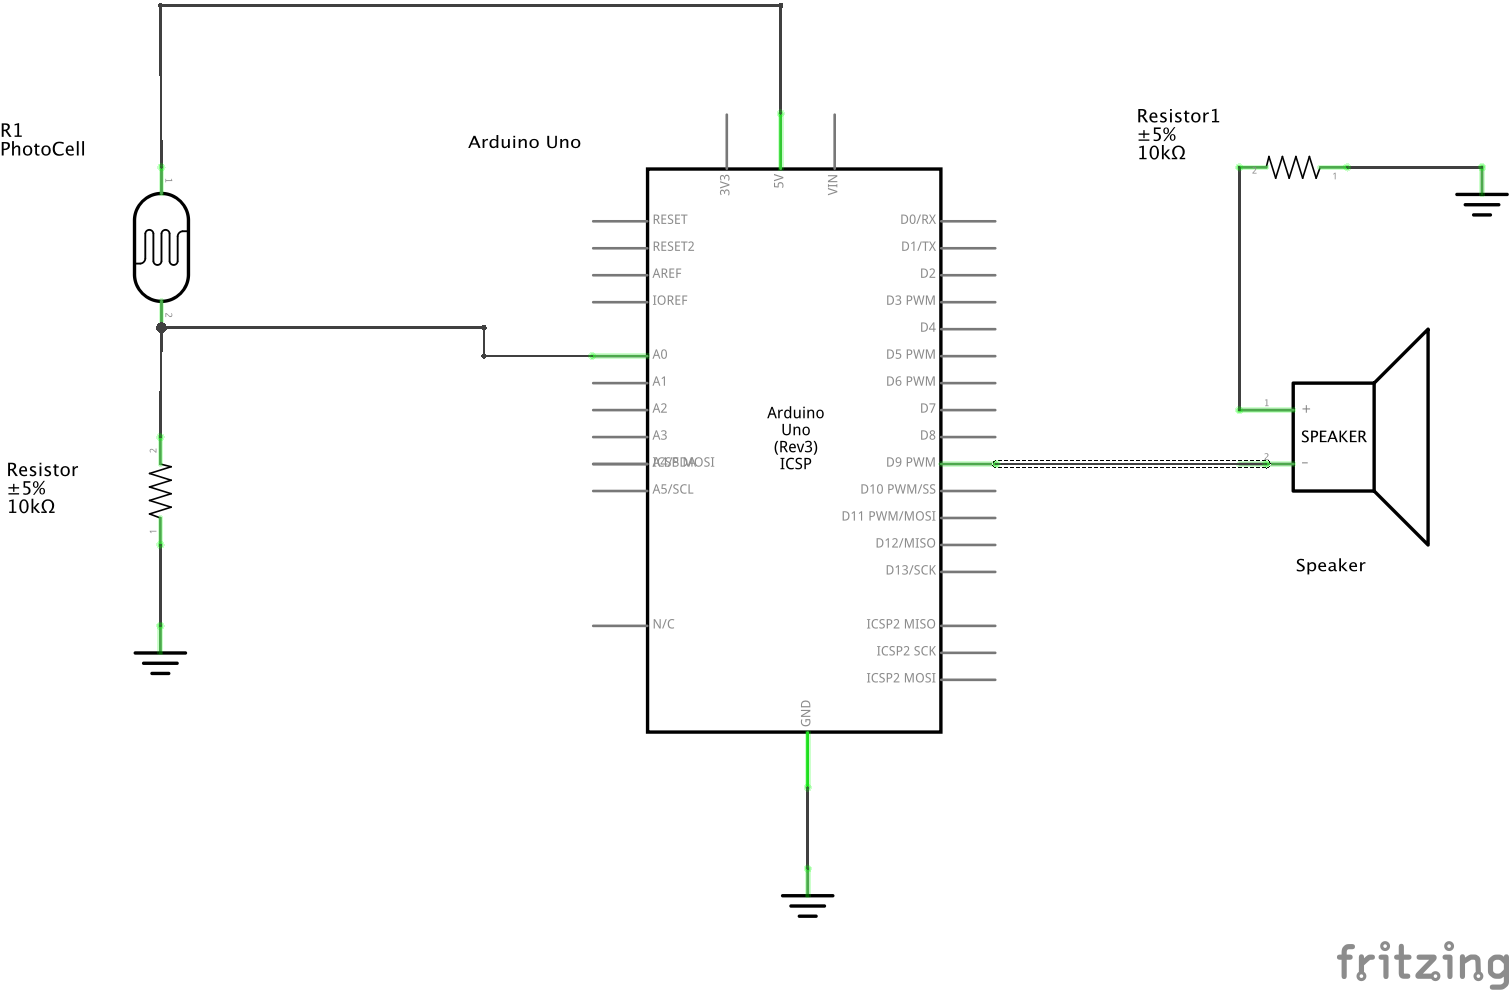
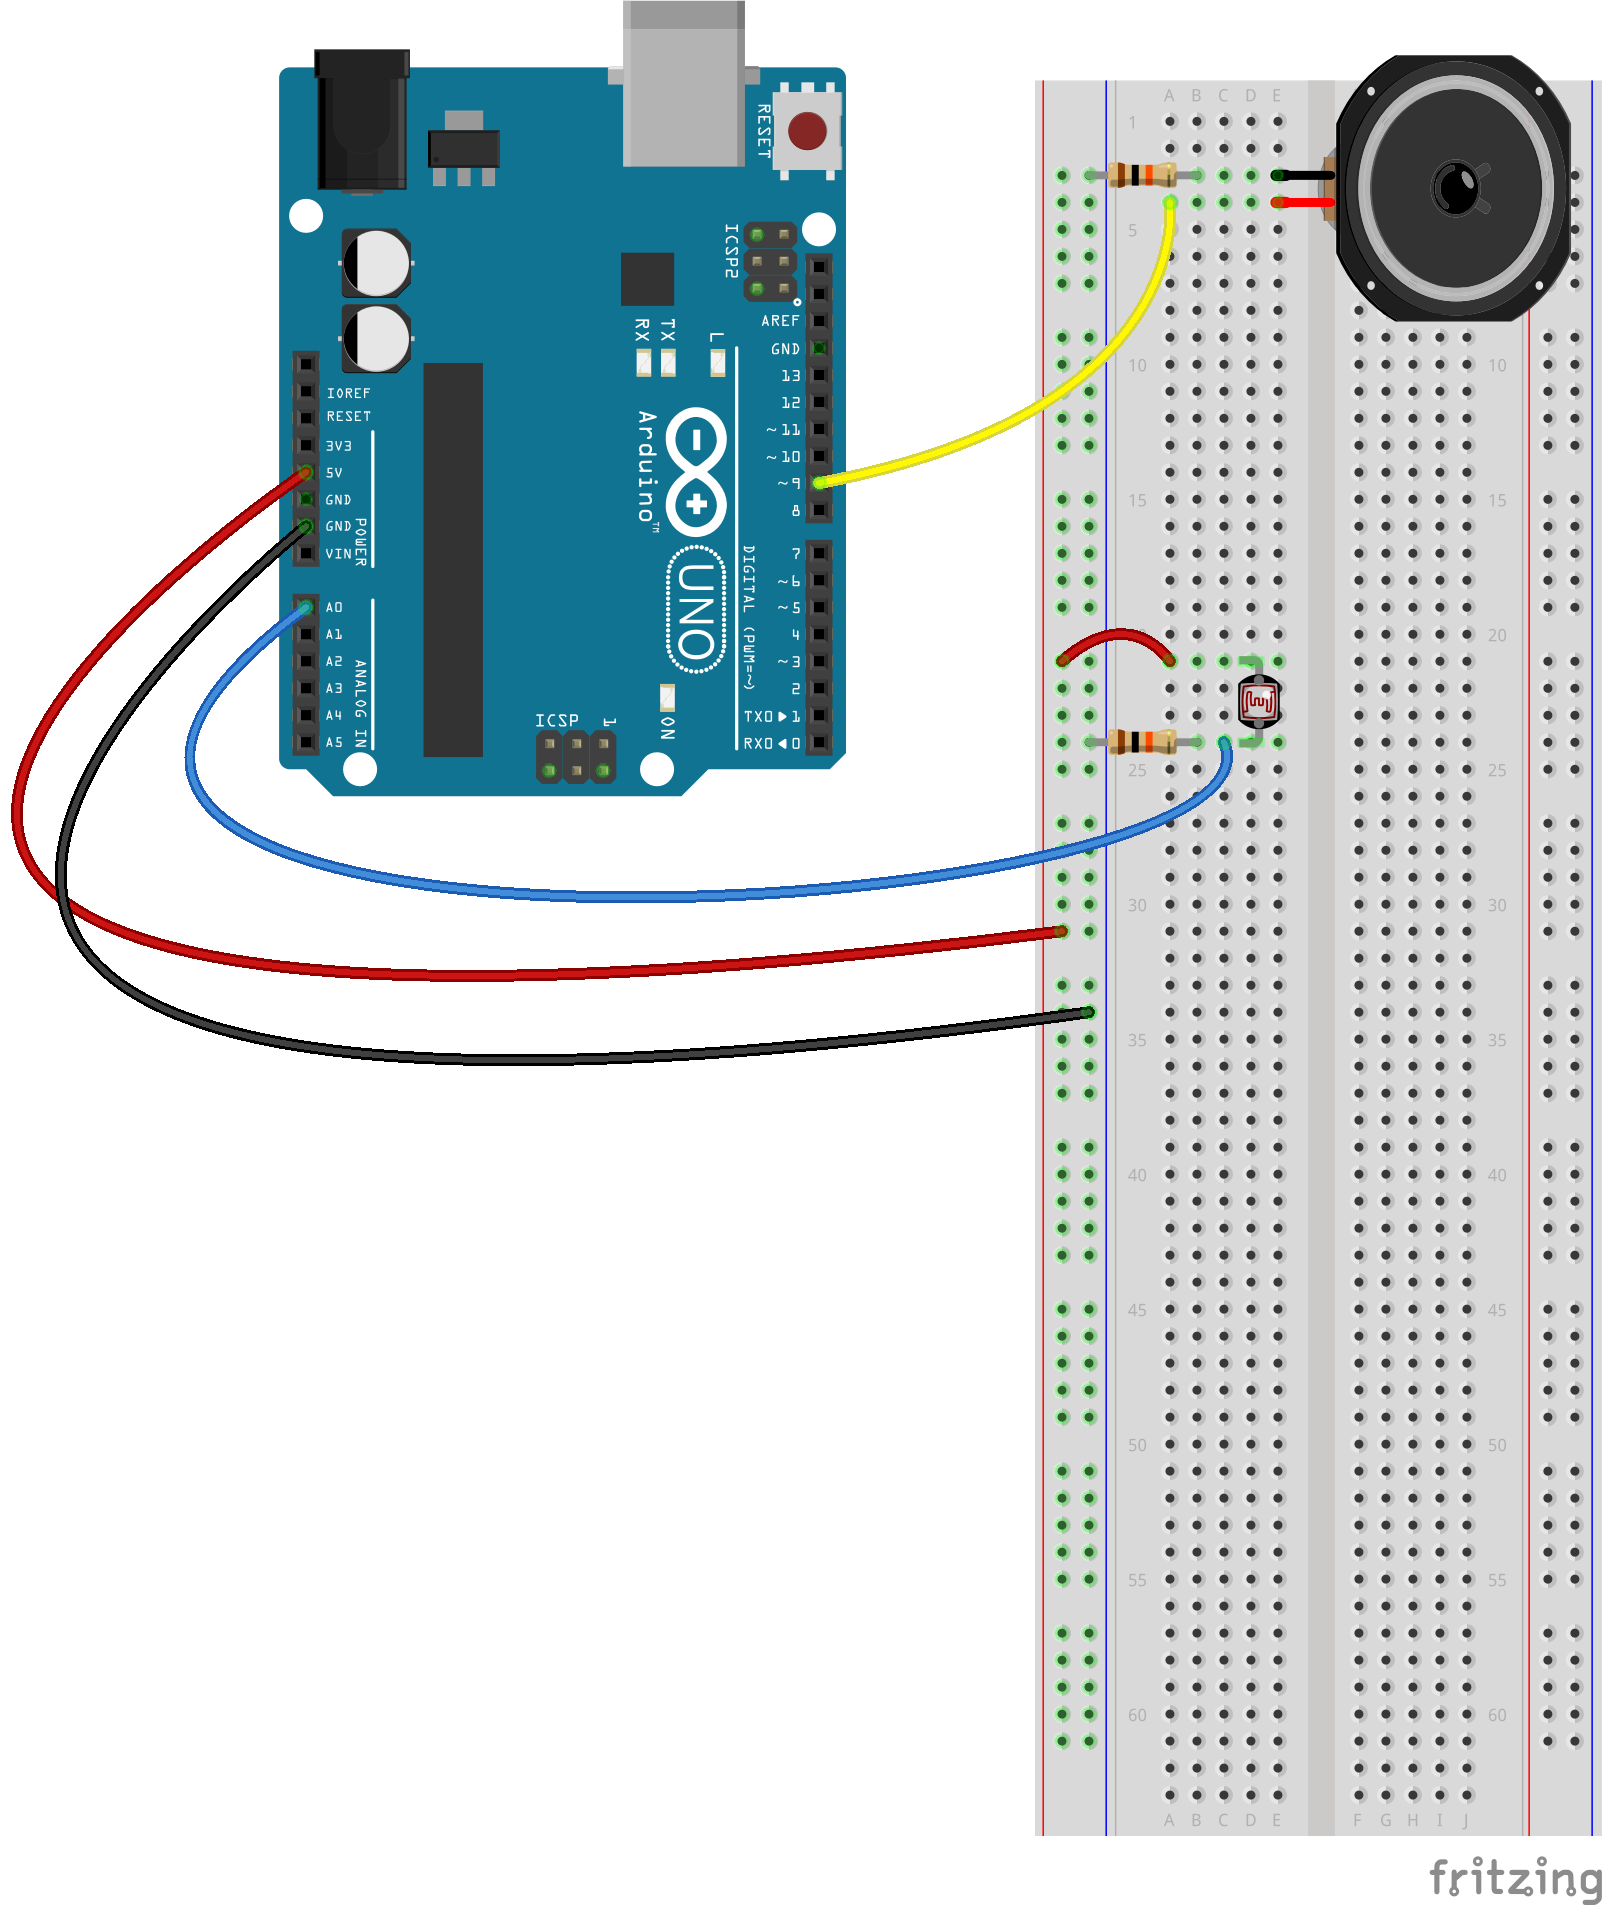
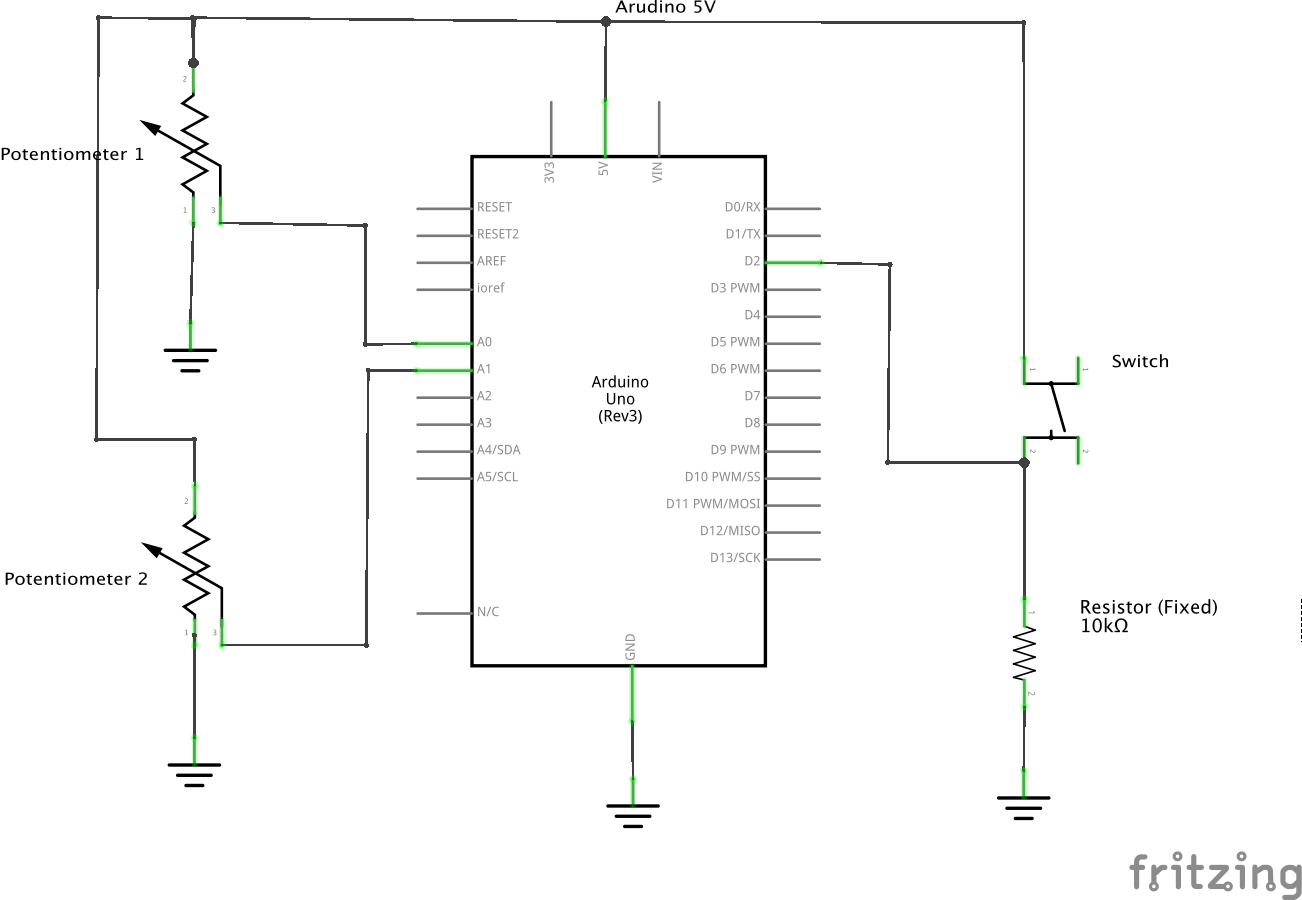
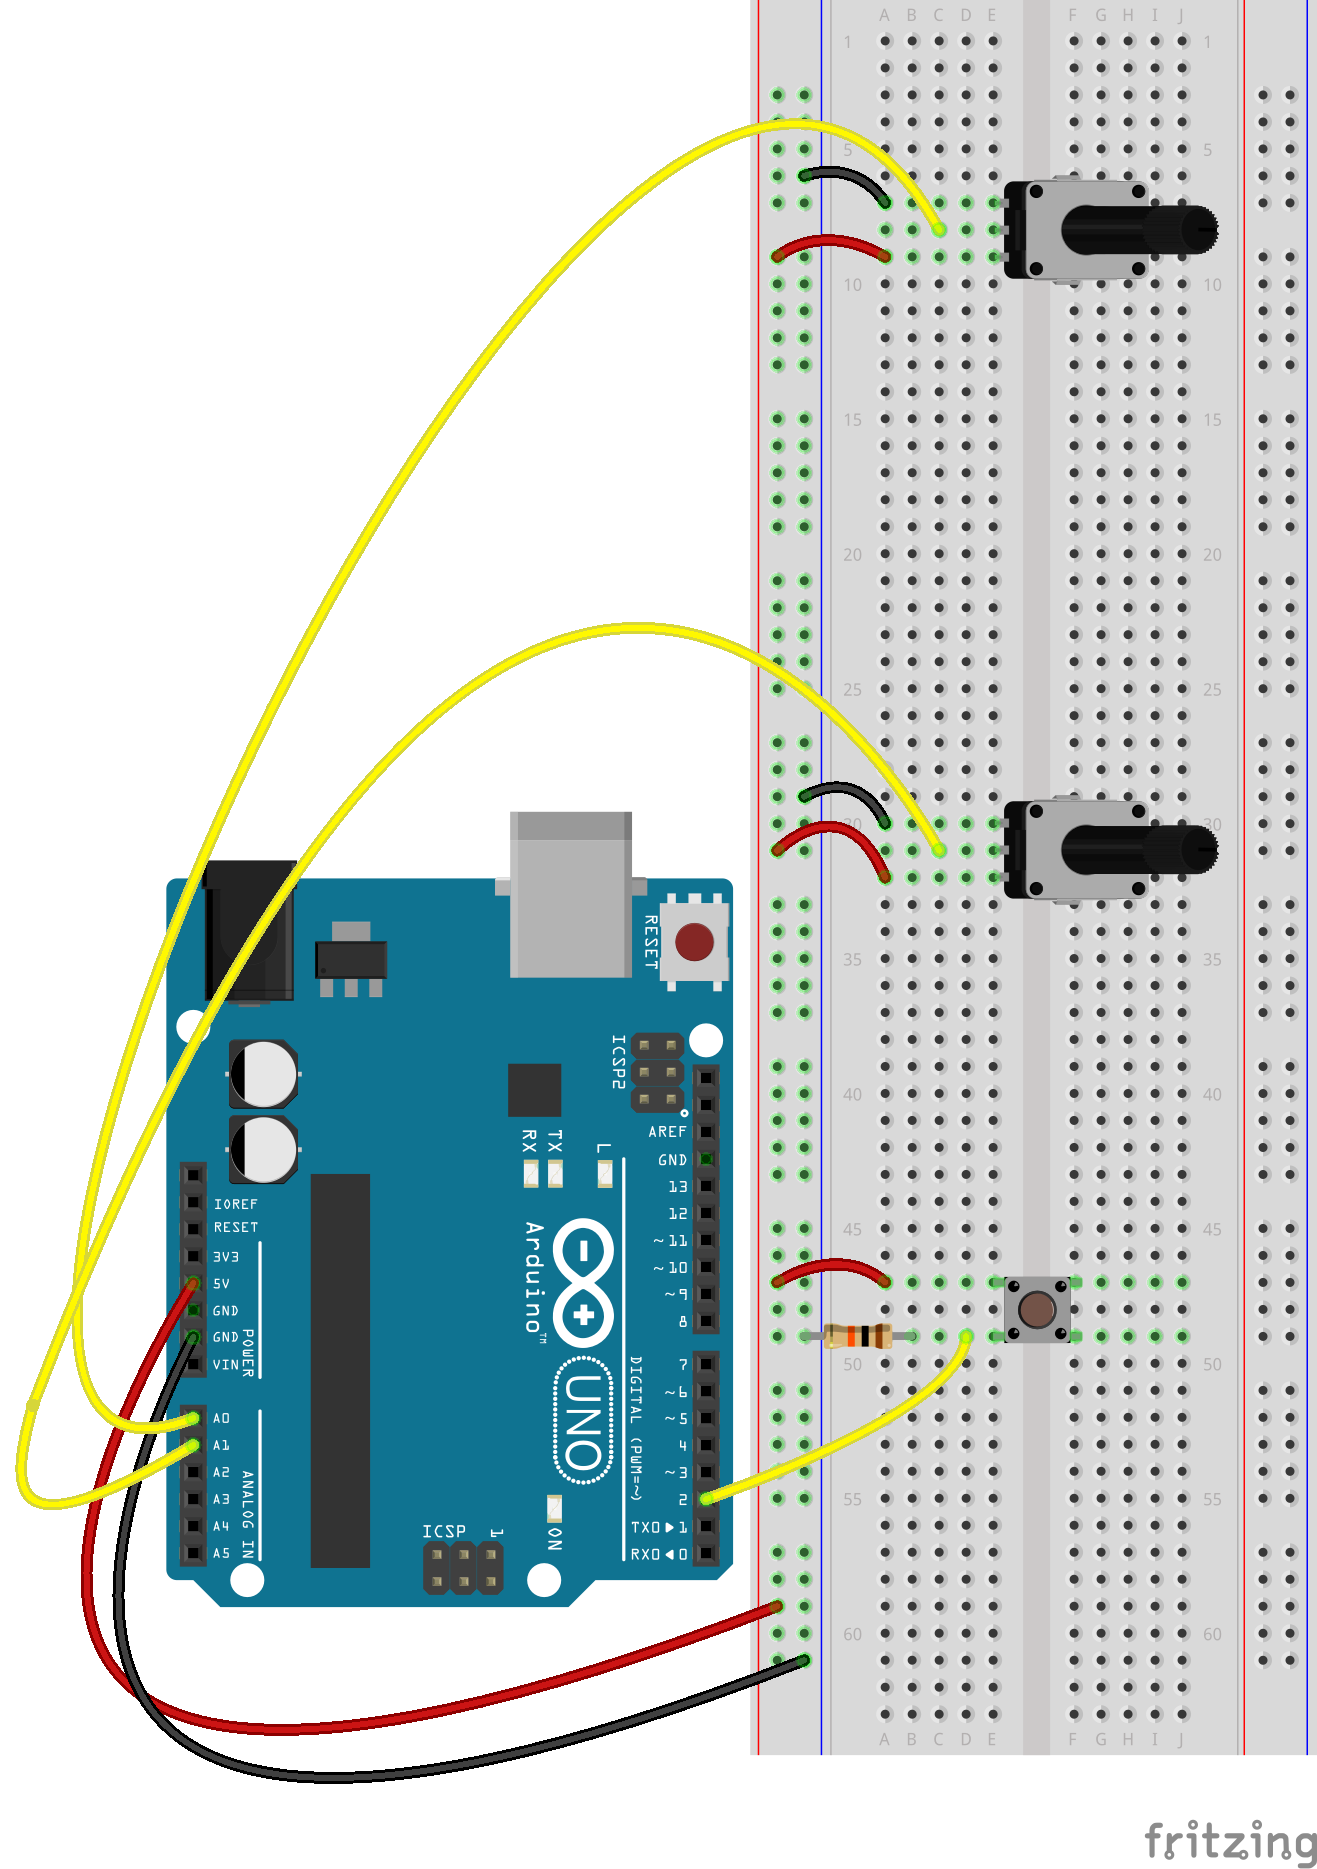
Lab 3: On Off and In Between
- Create circuit that makes use of Analog inputs and outputs. You may now use your hands (if you must...) to trigger interactions. If you choose to use hands then you CANNOT USE A POTENTIOMETER. Use a different sensor from your kit!
- BLOG POST 1: Document your work, include schematics of your work
- BLOG POST 2: Writing Assignment: Research a sensor, and blog your findings. What does the sensor sense? How does it work? What are some applications of the sensor? Include any relevant photos or videos
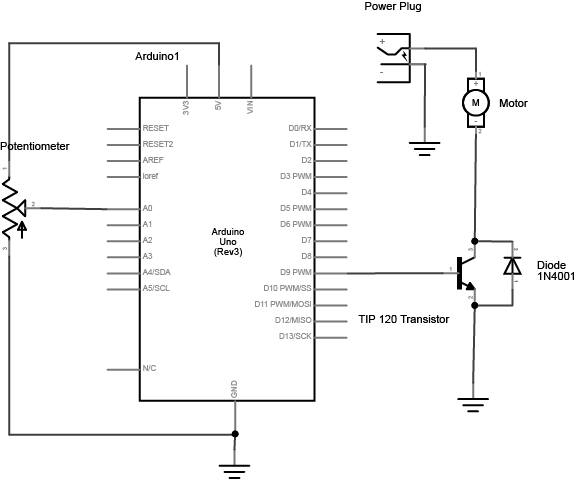
Lab 4: Motors
- Code from class
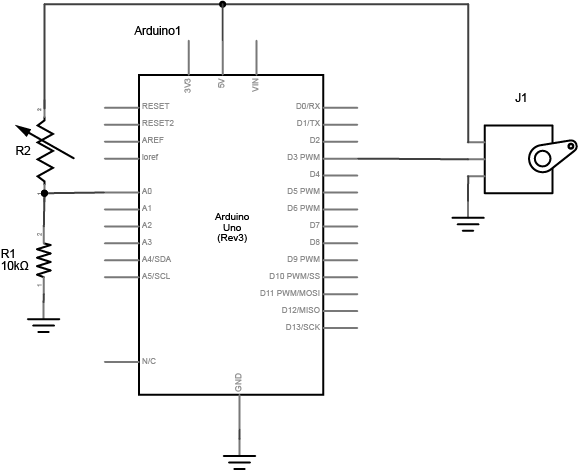
- Servomotor control,
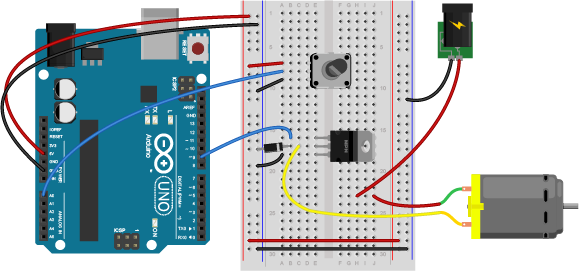
- High Current loads w/ transistor
- Transistor and Motor Videos!
- DC Motor w/ H-bridge,
- Stepper Motor w/ H-Bridge,
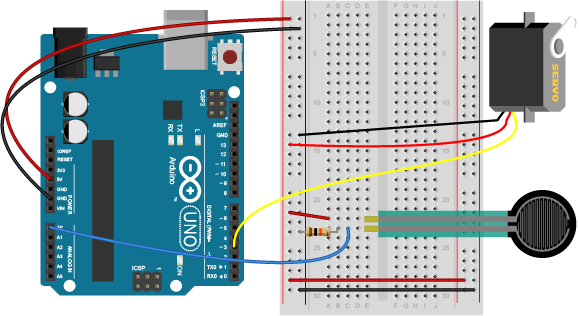
- Make something move. Try to use an analog sensor
- BLOG POST :Show your work. upload code, video, and schematics
Lab 5: Booleans Counters and Timers
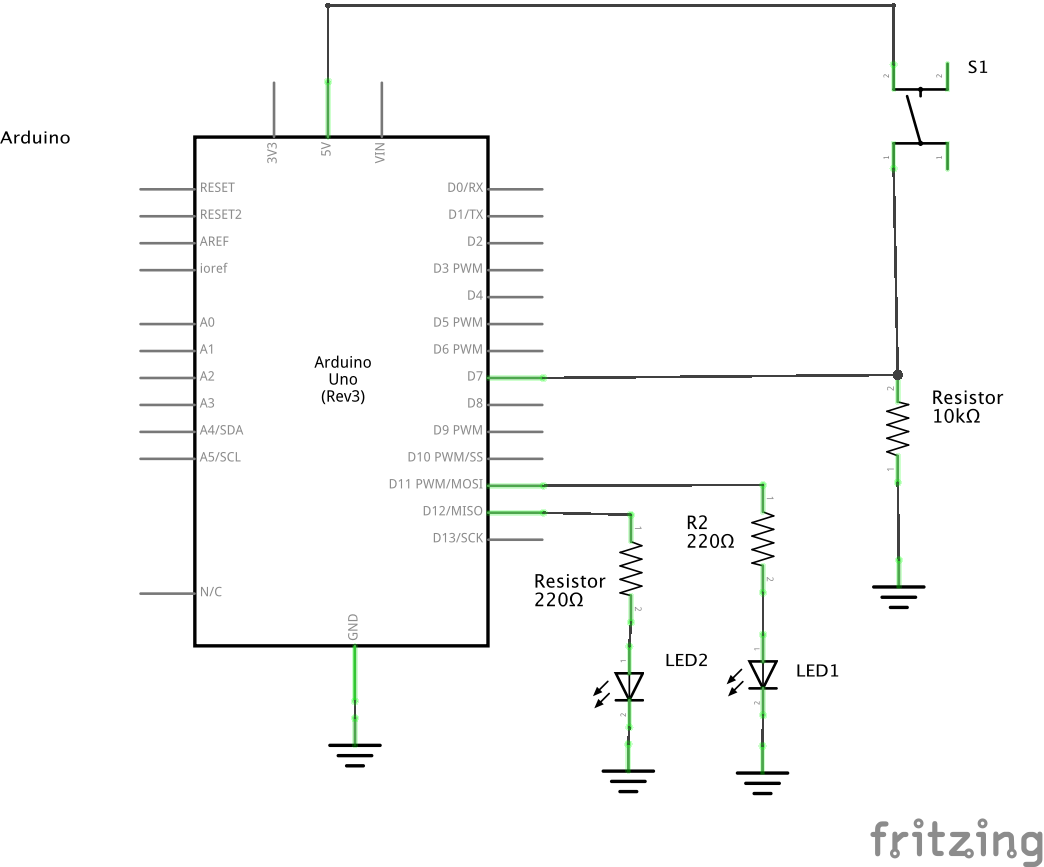
- Expand on what we did in class. Create a complex system (more than 2 states). Use booleans and counters.
- BLOG POST: Document your work movement
- Schematics from class:
- Download the complete p5js library and Download Brackets Text Editor and try to draw something. Make art. Make a selfie. Explore the documentation Come to class with questions
- Watch: p5 drawing videos
- References:
- Project References:

Lab 6: Drawing + Animation
- Use p5 to make a game or a simulation or a narrative
- Try uploading to github
- BLOG POST :Explain what you've made, and link to your work on github
Lab 7: Bits & Bytes: Computers talking to Computers
- Mac users select: "p5.serialcontrol-darwin-x64.zip"
- PC users select: "p5.serialcontrol-win32-x64.zip"
- Get your arduino and p5 sketch communicating. Have a sensor controlling something in p5, or have p5 control a physical output (via the arduino).
- BLOG POST : Upload sketch to github pages and code to your blog or include a link, schematics, video, photo as applicable
- ITP Lab Serial: Input Arduino to p5
- ITP Lab Serial: Output p5 to Arduino
- ITP Lab Serial: Two way duplex communication
- Examples from Class
Lab 8: Functionality
- Build on your animation (or start a new one) but make sure your draw loop only consists of calls to functions
- BLOG POST : Upload sketch to github pages and code to your blog or include a link, schematics, video, photo as applicable
- Blog your assignment.
Lab 9: Objects and Arrays
- Use the Constructor function, make objects, use an array
- BLOG POST : Upload sketch to github pages and code to your blog or include a link, schematics, video, photo as applicable
Lab 10: Pixels
- Use Pixels/ Video / Capture
- BLOG POST : Upload sketch to github pages and code to your blog or include a link, schematics, video, photo as applicable
Lab 11: Sound
- Sound Examples from Class
- Use Sound in a new project or an existing one
- BLOG POST : Upload sketch to github pages and code to your blog or include a link, schematics, video, photo as applicable